Keypair Authentication
Next to username/password, Snowflake also supports keypair (public/private key) authentication. This is typically used for Service Accounts, since it avoids the need to type in a password (and thus avoids MFA) for programmatic / scheduled access.
There are two ways to use keypair authentication from PowerBI Desktop, depending on how you connect to Snowflake:
- Via ODBC — works with either an unencrypted or an encrypted private key.
- Via the native Snowflake connector — requires an encrypted private key.
Prerequisite: generate your keypair
Before you can use either option below, you need a public/private keypair, and Paxon ⸗ Active Ants needs to have registered the fingerprint of your public key.
Follow the steps under Service Accounts - Private / public key setup to generate your keypair.
Keep in mind:
- If you intend to use Option 1 (ODBC), you can generate either an unencrypted or an encrypted private key.
- If you intend to use Option 2 (native connector), you must generate an encrypted private key. The native Snowflake connector will not accept an unencrypted key.
Option 1: ODBC connection in PowerBI
This option reuses the ODBC DSN described in ODBC - ODBC with private/public key. Set that up first:
- Configure a User DSN for Snowflake as described on the ODBC page.
- On the DSN configuration screen, set the Authenticator to
SNOWFLAKE_JWT, point "Private Key File" to your key file, and (if you generated an encrypted key) fill in the passphrase. Leave the passphrase blank if you used an unencrypted key.
Once the DSN is configured and tested successfully, connect to it from PowerBI Desktop:
- Start PowerBI Desktop, and click "Get Data".
- Search for "ODBC" and select it.
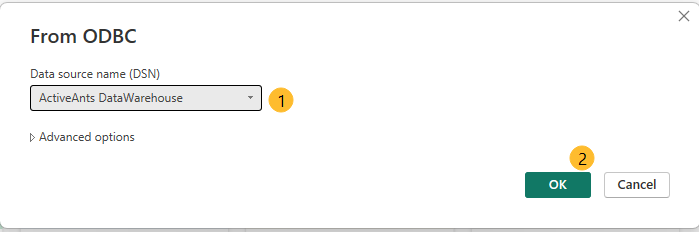
- Select the DSN you configured (1), and hit "OK" (2).
- Since the DSN already contains your keypair details, you can leave the credential prompt on its default ("Default or Custom") and hit "Connect". PowerBI will use the authentication configured in the DSN itself.
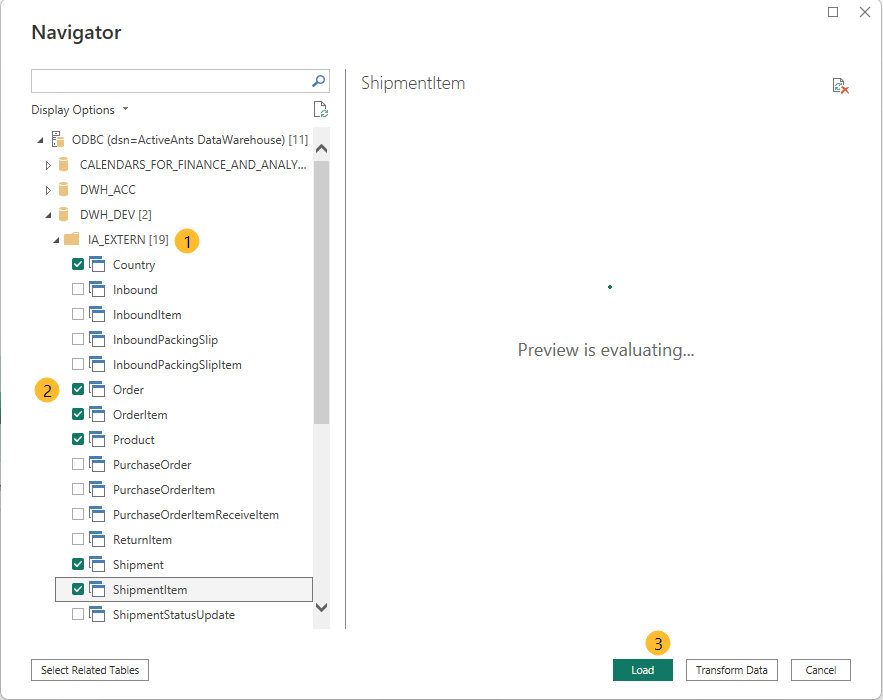
- Continue as usual: select the tables/views you need in the Navigator, and hit "Load".
Option 2: Native Snowflake connector with keypair
The native Snowflake connector (see Installation and Setup) also supports keypair authentication, but only accepts an encrypted private key.
- Start PowerBI Desktop, click "Get Data", and select "Snowflake" as described in Installation and Setup:
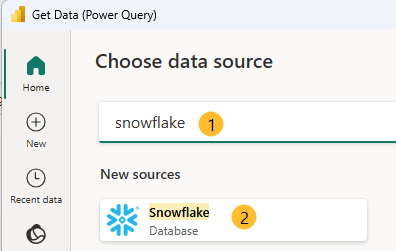
- Fill in the Server (astunbh-ln60614.snowflakecomputing.com) and Warehouse (WH_EXTERN_PRD) as before, and hit "OK".
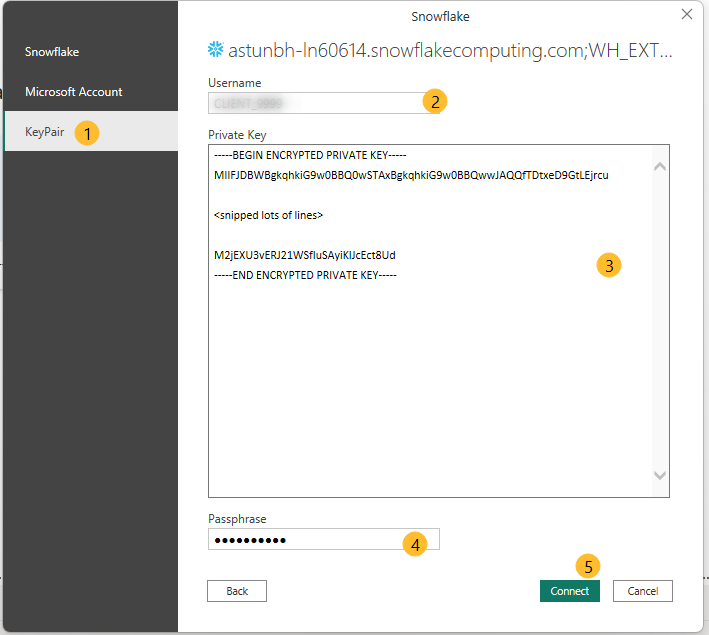
- On the credentials screen, instead of "Username / Password", select the credential type for keypair authentication (labelled "Key Pair" or similar, depending on your PowerBI Desktop version).
- Fill in:
- Username (e.g.
CLIENT_1234, as provided by Paxon ⸗ Active Ants). - Private Key — either the file path or the PEM contents, depending on the version of PowerBI Desktop.
- Private Key Passphrase — the passphrase you used when generating your encrypted key.
- Username (e.g.
- Hit "Connect".
If PowerBI rejects your key, double check that you generated an encrypted private key — the native connector does not support unencrypted keys, unlike the ODBC option above.
If you need to change these credentials later, see Reset Connection — the same "reset via Data source settings" procedure applies to keypair credentials.